Hey there! As a supplier of solvent laminating adhesive, I've seen firsthand the importance of applying it evenly. It can make or break the quality of your lamination projects. In this blog, I'm gonna share some tips and tricks on how to achieve that perfect, even application.
Understanding Solvent Laminating Adhesive
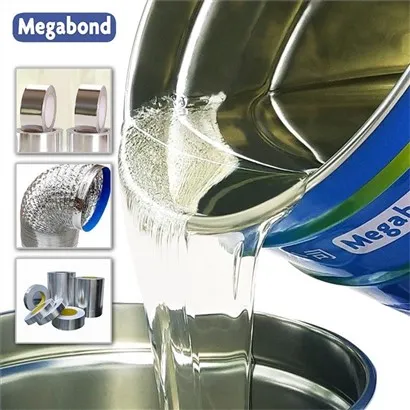
First things first, let's talk a bit about what solvent laminating adhesive is. It's a type of adhesive that uses solvents to dissolve the resin and create a bonding agent. This kind of adhesive is widely used in the packaging industry, especially for laminating different types of films and materials.
We offer a range of solvent laminating adhesives, like the Solvent-based 125℃ Anti-Retorting Laminating Adhesive, Solvent-based Film Laminating Adhesive, and Solvent-based AL-plating Film Laminating Adhesive. Each one is designed for specific applications, so it's important to choose the right one for your project.
Preparing the Surface
Before you start applying the adhesive, you need to make sure the surface is clean and dry. Any dirt, dust, or moisture can affect the adhesion and lead to uneven application. You can use a clean, lint-free cloth to wipe down the surface and remove any debris. If the surface is particularly dirty, you might need to use a mild detergent and water to clean it, but make sure to dry it thoroughly before applying the adhesive.
Another important thing to consider is the surface texture. Some materials have a smooth surface, while others are more rough or porous. The texture of the surface can affect how the adhesive spreads and adheres. For smooth surfaces, the adhesive might spread more easily, but it might also be more prone to slipping. For rough or porous surfaces, the adhesive might need to penetrate deeper to create a strong bond, which can take a bit more time and effort.
Mixing the Adhesive
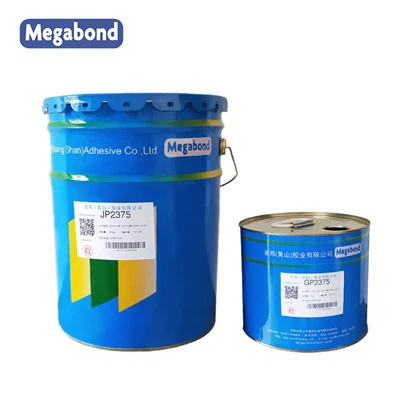
Most solvent laminating adhesives come in two parts: a resin and a hardener. You need to mix these two components together in the right ratio to activate the adhesive. The mixing ratio is usually specified on the product label, so make sure to follow the instructions carefully.
When mixing the adhesive, it's important to use a clean container and a stirrer. You want to make sure the two components are thoroughly mixed together to ensure a consistent bond. You can use a mechanical stirrer or a hand mixer, depending on the amount of adhesive you need to mix. Just make sure to stir for the recommended amount of time to ensure a homogeneous mixture.
Applying the Adhesive
Now comes the fun part: applying the adhesive. There are several methods you can use to apply solvent laminating adhesive, including roller coating, spray coating, and knife coating. Each method has its own advantages and disadvantages, so you need to choose the one that's best for your project.
Roller Coating
Roller coating is one of the most common methods for applying solvent laminating adhesive. It's relatively easy to use and can provide a consistent coating thickness. To use a roller, you simply dip it into the adhesive and roll it onto the surface. Make sure to apply the adhesive evenly and avoid leaving any streaks or bubbles.
When using a roller, it's important to choose the right type of roller for the job. There are different types of rollers available, each with a different nap length and material. The nap length refers to the length of the fibers on the roller, and it can affect how much adhesive is applied. A shorter nap length is usually better for smooth surfaces, while a longer nap length is better for rough or porous surfaces.
Spray Coating
Spray coating is another popular method for applying solvent laminating adhesive. It's a fast and efficient way to apply the adhesive, especially for large surfaces. To use a spray gun, you need to connect it to a compressed air source and fill it with the adhesive. Then, you simply spray the adhesive onto the surface in a thin, even layer.


When using a spray gun, it's important to adjust the spray pattern and pressure to ensure a consistent coating. You also need to make sure to wear appropriate protective gear, such as a respirator and gloves, to avoid inhaling the solvent fumes.
Knife Coating
Knife coating is a more precise method for applying solvent laminating adhesive. It's often used for applications where a very thin and even coating is required. To use a knife coater, you simply place the adhesive on the surface and use a knife or blade to spread it evenly.
When using a knife coater, it's important to use a sharp blade and apply even pressure to ensure a consistent coating thickness. You also need to make sure to clean the blade regularly to prevent the adhesive from building up and affecting the coating quality.
Controlling the Coating Thickness
One of the key factors in achieving an even application of solvent laminating adhesive is controlling the coating thickness. The coating thickness can affect the strength of the bond, the drying time, and the overall appearance of the lamination.
To control the coating thickness, you can use a variety of tools and techniques. For example, you can use a coating bar or a doctor blade to set the desired thickness. You can also adjust the speed and pressure of the application method to control how much adhesive is applied.
It's important to note that the coating thickness can vary depending on the type of adhesive, the surface texture, and the application method. So, it's a good idea to do some test runs on a small area first to determine the optimal coating thickness for your project.
Drying and Curing
After you've applied the adhesive, you need to let it dry and cure. Drying refers to the process of the solvent evaporating from the adhesive, while curing refers to the chemical reaction that takes place between the resin and the hardener to form a strong bond.
The drying and curing time can vary depending on several factors, including the type of adhesive, the temperature, and the humidity. In general, solvent laminating adhesives dry relatively quickly, but they might take longer to fully cure. You can speed up the drying and curing process by using a fan or a heater, but make sure not to overheat the adhesive, as this can affect the bond strength.
It's important to let the adhesive dry and cure completely before handling the laminated materials. If you handle the materials too soon, you might damage the bond and cause the lamination to peel or separate.
Troubleshooting
Even if you follow all the steps correctly, you might still encounter some problems when applying solvent laminating adhesive. Here are some common issues and how to troubleshoot them:
Uneven Coating
If you notice that the adhesive is not spreading evenly or there are streaks or bubbles, it could be due to a few different reasons. First, make sure the surface is clean and dry. Any dirt, dust, or moisture can affect the adhesion and lead to uneven application. Second, make sure you're mixing the adhesive correctly and using the right ratio. If the adhesive is not mixed properly, it might not spread evenly or create a strong bond. Finally, make sure you're using the right application method and technique. If you're using a roller, make sure it's the right type and that you're applying even pressure. If you're using a spray gun, make sure the spray pattern and pressure are adjusted correctly.
Poor Adhesion
If the adhesive is not adhering properly to the surface, it could be due to a few different reasons. First, make sure the surface is clean and dry. Any dirt, dust, or moisture can affect the adhesion and lead to poor bonding. Second, make sure you're using the right type of adhesive for the material. Different materials require different types of adhesives, so make sure you choose the one that's compatible with your material. Finally, make sure you're applying the adhesive correctly and letting it dry and cure completely. If you don't let the adhesive dry and cure properly, it might not create a strong bond.
Bubbles
If you notice bubbles in the adhesive, it could be due to a few different reasons. First, make sure you're mixing the adhesive correctly and not introducing any air into the mixture. If you're using a mechanical stirrer, make sure it's not spinning too fast, as this can create bubbles. Second, make sure you're applying the adhesive evenly and not leaving any air pockets. If you're using a roller, make sure you're rolling it in one direction and not back and forth, as this can trap air bubbles. Finally, make sure you're letting the adhesive dry and cure properly. If you don't let the adhesive dry and cure completely, the bubbles might not disappear.
Conclusion
Applying solvent laminating adhesive evenly is not always easy, but it's definitely achievable with the right techniques and tools. By following the tips and tricks outlined in this blog, you can ensure a consistent and strong bond for your lamination projects.
If you have any questions or need more information about our solvent laminating adhesives, feel free to reach out to us. We're always happy to help and can provide you with the support you need to choose the right product for your project.
References
- Manufacturer's product labels and instructions
- Industry best practices and guidelines