As a seasoned supplier of solvent-based lamination adhesives, I understand that applying these adhesives effectively is crucial for achieving high-quality lamination results. In this blog post, I'll share comprehensive insights on how to apply solvent-based lamination adhesive, covering everything from surface preparation to post-application handling.
Understanding Solvent-Based Lamination Adhesives
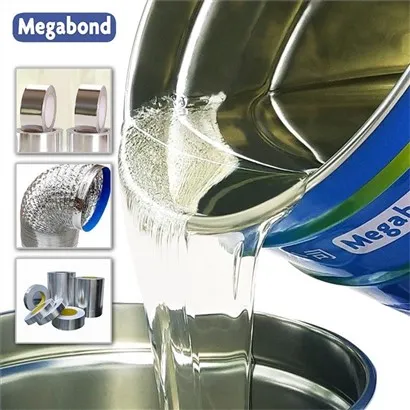
Solvent-based lamination adhesives are widely used in various industries due to their excellent bonding strength, fast drying time, and good resistance to chemicals and heat. Our product range includes Solvent-based 121℃ Anti-Retorting PU Laminating Adhesive, Solvent-based Anti-Chemicals Polyether Laminating Adhesive, and Solvent-based 125℃ Anti-Retorting Laminating Adhesive, each designed to meet specific application requirements.
Step 1: Surface Preparation
The first and most critical step in applying solvent-based lamination adhesive is surface preparation. The surfaces to be bonded must be clean, dry, and free from any contaminants such as dust, oil, grease, or oxidation. Any impurities on the surface can significantly reduce the adhesive's bonding strength and lead to poor lamination results.
- Cleaning: Use a suitable cleaning agent to remove dirt, oil, and grease from the surfaces. For metal surfaces, a degreaser can be used, while for plastic or paper surfaces, a mild detergent solution may be sufficient. After cleaning, rinse the surfaces thoroughly with water and allow them to dry completely.
- Abrasion: In some cases, it may be necessary to abrade the surfaces to increase the adhesive's bonding strength. This can be done using sandpaper or a wire brush to create a rough surface texture. However, be careful not to over-abrade the surfaces, as this can damage them and reduce the adhesive's performance.
- Priming: For certain materials, such as some plastics or metals, priming the surfaces before applying the adhesive can improve the bonding strength. Primers are specially formulated coatings that help the adhesive adhere better to the surface. Follow the manufacturer's instructions when using a primer, including the recommended drying time.
Step 2: Adhesive Mixing
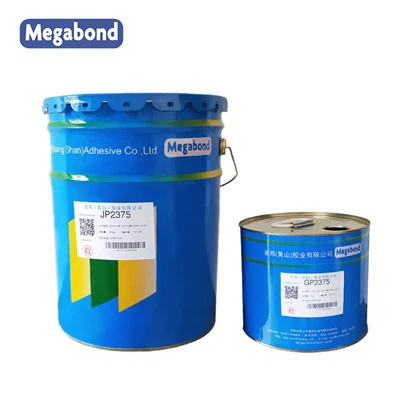
Most solvent-based lamination adhesives are two-component systems, consisting of a resin and a hardener. These components must be mixed thoroughly in the correct ratio to ensure proper curing and bonding.
- Ratio: Carefully measure the resin and hardener according to the manufacturer's instructions. Using the wrong ratio can result in incomplete curing, reduced bonding strength, or other performance issues.
- Mixing: Use a clean mixing container and a stirrer to mix the resin and hardener together. Stir the mixture for the recommended time, usually several minutes, to ensure a homogeneous blend. Make sure to scrape the sides and bottom of the container to ensure that all the components are fully mixed.
- Pot Life: Once the adhesive is mixed, it has a limited pot life, which is the time during which it remains usable. After the pot life has expired, the adhesive will start to cure and become unusable. Therefore, it's important to use the mixed adhesive within the specified pot life.
Step 3: Application
There are several methods for applying solvent-based lamination adhesive, including roll coating, spray coating, and brush coating. The choice of application method depends on the type of substrate, the size and shape of the parts to be bonded, and the desired adhesive thickness.
- Roll Coating: Roll coating is a common method for applying solvent-based lamination adhesive to large, flat surfaces. In this method, the adhesive is applied to the surface using a roller. The roller spreads the adhesive evenly across the surface, creating a thin, uniform layer. Roll coating is a fast and efficient method, but it may not be suitable for complex shapes or small parts.
- Spray Coating: Spray coating is another popular method for applying solvent-based lamination adhesive. In this method, the adhesive is sprayed onto the surface using a spray gun. Spray coating allows for precise control of the adhesive thickness and can be used to apply the adhesive to complex shapes and hard-to-reach areas. However, spray coating requires special equipment and proper ventilation to ensure safety.
- Brush Coating: Brush coating is a simple and inexpensive method for applying solvent-based lamination adhesive to small parts or areas. In this method, the adhesive is applied to the surface using a brush. Brush coating allows for more control over the adhesive application, but it may not be as efficient as roll or spray coating for large surfaces.
Step 4: Lamination
After the adhesive has been applied to one or both of the surfaces to be bonded, the two surfaces are brought together and pressed firmly to ensure good contact.
- Pressure: Apply sufficient pressure to the laminated surfaces to ensure that the adhesive spreads evenly and fills any gaps or voids. The amount of pressure required depends on the type of adhesive and the substrate materials. Follow the manufacturer's instructions for the recommended pressure.
- Temperature: In some cases, applying heat during the lamination process can help the adhesive cure faster and improve the bonding strength. However, be careful not to overheat the adhesive, as this can cause it to degrade or release harmful fumes. Follow the manufacturer's instructions for the recommended temperature and heating time.
- Drying: After the lamination process, allow the adhesive to dry and cure for the recommended time. The drying time depends on several factors, including the type of adhesive, the ambient temperature and humidity, and the thickness of the adhesive layer. During the drying process, make sure to keep the laminated parts in a clean, dry environment to prevent contamination.
Step 5: Post-Application Handling
Once the adhesive has cured, it's important to handle the laminated parts carefully to avoid damaging the bond.
- Storage: Store the laminated parts in a cool, dry place away from direct sunlight and heat sources. This will help to maintain the adhesive's performance and prevent it from deteriorating over time.
- Testing: If possible, test the laminated parts to ensure that the bond is strong and meets the required specifications. This can be done using a peel test or a shear test, depending on the application.
- Cleaning: If necessary, clean the laminated parts using a mild detergent solution and a soft cloth. Avoid using abrasive cleaners or solvents that may damage the adhesive bond.
Troubleshooting
Even when following the proper application procedures, problems may still occur. Here are some common issues and their possible solutions:


- Poor Bonding: If the adhesive bond is weak or fails, it may be due to improper surface preparation, incorrect adhesive mixing, or insufficient pressure during lamination. Check the surface preparation steps, make sure the adhesive is mixed correctly, and apply more pressure during lamination.
- Bubbles or Voids: Bubbles or voids in the adhesive layer can be caused by air entrapment during the application process or improper drying. To prevent bubbles, make sure the adhesive is applied evenly and that the surfaces are properly aligned before lamination. If bubbles do occur, try applying more pressure or using a vacuum to remove the air.
- Adhesive Transfer: In some cases, the adhesive may transfer from one surface to the other during the lamination process. This can be caused by using too much adhesive or applying the adhesive too thickly. Reduce the amount of adhesive used and make sure to apply it in a thin, uniform layer.
Conclusion
Applying solvent-based lamination adhesive requires careful attention to detail and following the proper procedures. By preparing the surfaces correctly, mixing the adhesive thoroughly, applying it using the appropriate method, and handling the laminated parts carefully, you can achieve high-quality lamination results.
If you have any questions about applying our solvent-based lamination adhesives or need further assistance, please don't hesitate to contact us. We're here to help you find the best adhesive solution for your specific application and ensure your success.
References
- Adhesive Application Guide, Manufacturer's Manual
- Surface Preparation Techniques for Bonding, Industry Research Report